DanFST
Head Pro
I know this isn't the most techy forum. But I thought I'd post up a guide on how to change your putter shaft. Very simple job.
Step 1) We first off need to get the old shaft out., we can use a heatgun or a blowtorch. All we are aiming to do is heat up the glue inside the hosel, not melt the damn thing. A couple of seconds will do the job.
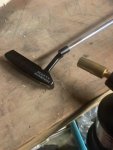
Step 2) After we've heated up enough, we can pull the shaft out of the head, it will be warm to the touch so be careful!
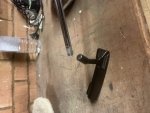
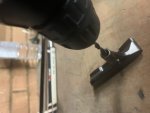
Step 3) We need to get rid of the glue inside the hosel to promote a great bond. Using a small drill bit at a slow speed, rub the edge of the hosel, disturbing the glue that remains. We aren't drilling, just dislodging. You can also use a roll of sandpaper.
Step 4) Insert the new shaft all the way in, then make a mark of where it meets the hosel.
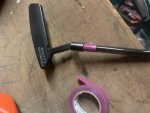
Step 4) Remove the shaft, and then using some sandpaper rough up the shaft. This gives the glue some room to adhere rather than a shiny surface.
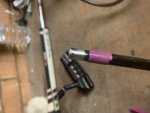
Step 5) We need to mix up the epoxy. (I'm using gorilla in this instance). Chuck it on a tee, the place it into the hosel and add a touch to the end of the shaft.
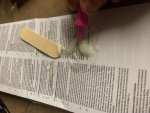
Step 6) WE need to clean up the glue that's squirted out. If you added loads in step 5, the excess will be more than this. You'll learn the right amount after time.
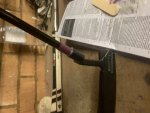
Step 7) Whilst that's curing, lets go to the other side. We need to cut down the shaft to the correct size. I just lined up my old silver shaft, then marked. Cut with a disc or hacksaw. Then we need to file it down so we don't cut ourselves.
After that, we are ready to tape and regrip. Give the glue a couple of hours to fully cure. Then we are good to go!

Step 1) We first off need to get the old shaft out., we can use a heatgun or a blowtorch. All we are aiming to do is heat up the glue inside the hosel, not melt the damn thing. A couple of seconds will do the job.

Step 2) After we've heated up enough, we can pull the shaft out of the head, it will be warm to the touch so be careful!

Step 3) We need to get rid of the glue inside the hosel to promote a great bond. Using a small drill bit at a slow speed, rub the edge of the hosel, disturbing the glue that remains. We aren't drilling, just dislodging. You can also use a roll of sandpaper.

Step 4) Insert the new shaft all the way in, then make a mark of where it meets the hosel.

Step 4) Remove the shaft, and then using some sandpaper rough up the shaft. This gives the glue some room to adhere rather than a shiny surface.

Step 5) We need to mix up the epoxy. (I'm using gorilla in this instance). Chuck it on a tee, the place it into the hosel and add a touch to the end of the shaft.

Step 6) WE need to clean up the glue that's squirted out. If you added loads in step 5, the excess will be more than this. You'll learn the right amount after time.

Step 7) Whilst that's curing, lets go to the other side. We need to cut down the shaft to the correct size. I just lined up my old silver shaft, then marked. Cut with a disc or hacksaw. Then we need to file it down so we don't cut ourselves.

After that, we are ready to tape and regrip. Give the glue a couple of hours to fully cure. Then we are good to go!

Last edited:

